Read about NCAT’s Energy Corps members in Butte and their last Hoorah:
Step 0: Find a teacher who wants you to do this activity. Ask permission from the principal. Some school administrators are wary of small children handling tiny bits of glass (understandably so).
Step 0.5: Find some volunteers early on and lock them down! This process (especially conducting the activity with students) is much easier with extra hands.
Step 1: Obtain an abundance of pulverized glass. Stare admirably at the glass and appreciate its beauty. Soon, its beauty will fade into an abhorrence of meticulous work.
Step 2: Clean and sort the glass. Clean the glass using a colander. Sort colors according to whatever image you choose to glue onto. We sorted yellow, clear and dark brown glass for the yellow jacket. Be sure to remove debris- bits paper and small rocks mixed in with the glass.
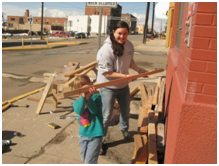
 Step 3: Find some boards that you can reuse. Thankfully, the basement of NCAT is a gold mine for materials just waiting to be repurposed. Ours were a mixture of wood, particle board and sheetrock. We needed six for three different projects: three larger boards (base boards) and three slightly smaller boards (design board). Since this was being used for an Earth Day event, we also cut three thin boards to be used as title boards.
Step 4: Cut the boards down to whatever size you need. Remember, measure twice, cut once.
Step 5: Find the image that you want online or upload the picture onto a computer. Project the image onto a wall and trace it onto your up-cycled board. Once you’re done tracing, outline your design with a thick black marker.
 Step 6: Procure paint and apply accordingly. Repeat as needed- we needed two coats for everything. A basic acrylic paint works just fine (but does not wash out of your clothes).
Step 7: Once you finish all your coats, go back over the outline with thick black marker.
Step 8: Cut the design boards into four equal parts. Touch up with paint as needed.
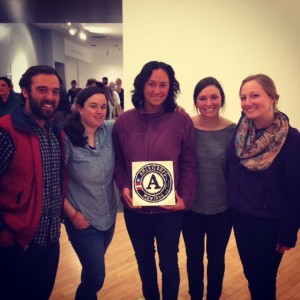
Step 9: Obtain tacky glue and modge podge. Test gluing glass down and modge-podging it by making mini mosaics that you can use as gifts. We made the AmeriCorps logo and gave it to our supervisors. This gift went over very well and we highly recommend it J
Step 10: Make your mosaic! We gave groups of four-five students two small cups of glue (applied with popsicle sticks) and two cups of glass (depending on how many colors you need). Watch with joy (and maybe some relief) the glee on children’s faces as they celebrate Earth Day!


Step 11: Clean up/touch up the mosaics. Just like some kids don’t color inside the lines, some kids don’t glue glass inside the lines either. Modge-podge the entire thing (for three mosaics we were able to apply two coats using one bottle).
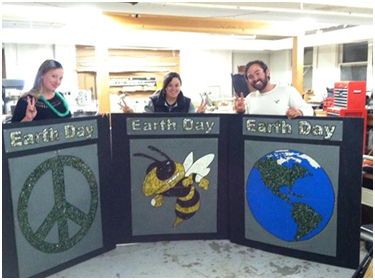
Step 12: Assemble designs and deliver to school! Again, watch the joy spread over the faces of teachers and students alike. Bask in pride for a moment and then get back to work!
 These are the steps we took to complete this Earth Day project. We truly enjoyed it despite having to sort a ridiculous amount of glass. We started prepping for this in early March and probably worked on it for an hour or two every day right up until April 22nd. This would not have been possible without the help of Kaleena Miller, Andi Giddings, Meghan Boyce, Tiffany Samson, and all of the second grade teachers at Emerson Elementary.
The authors of this blog include Rachael Bramblett, Michael Daniel, and Eileen Munsch.